

Introduction to Electronic Soldering Tools
If you’ve ever tried fixing a circuit board, assembling a DIY gadget, or tinkering with electronics, you know that a simple mistake can ruin hours of work. That’s where electronic soldering tools come in. These are the essential devices that let you connect components, repair boards, and bring projects to life with clean, reliable joints.
At their core, electronic soldering tools are designed to heat solder so it melts and bonds two metal surfaces usually wires or circuit pads together. Sounds simple, right? But anyone who’s struggled with a cold joint, a messy blob, or a scorched component knows that doing it well takes the right tools and a bit of practice.
These tools aren’t just for professionals. Hobbyists, makers, and DIY enthusiasts rely on them to assemble kits, build gadgets, or repair small electronics at home. From fixing your smartphone’s charging port to creating a custom Arduino project, electronic soldering tools make the difference between a functional, neat project and a frustrating failure.
Table of Contents
Types of Soldering Tools
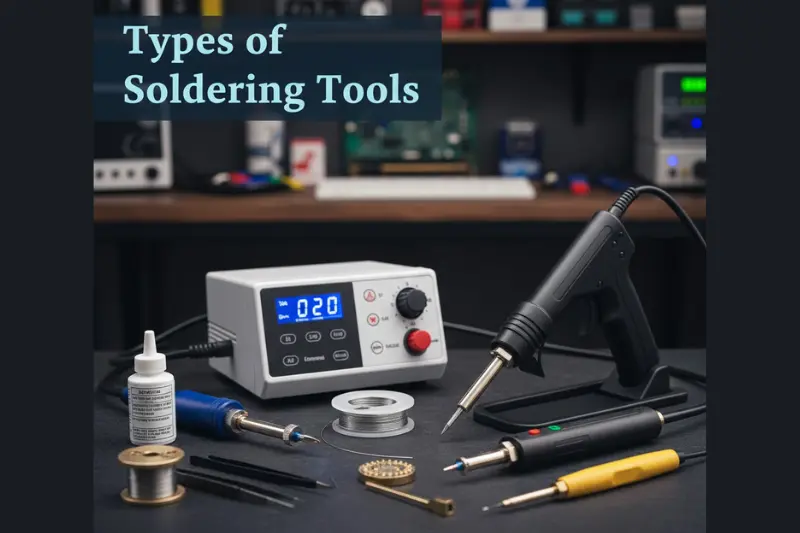
When it comes to electronic soldering tools, one size definitely does not fit all. Choosing the right type can save you a lot of frustration, improve your precision, and even prevent damage to delicate components. Let’s break down the main types you’re likely to encounter:
Soldering Irons
The classic workhorse of electronics. A soldering iron is a simple, handheld device with a heated tip that melts solder. They’re perfect for small repairs, hobby projects, or occasional use. While basic irons get the job done, digital irons with adjustable temperature give you better control, especially for sensitive microchips or thin wires.
Mini tip: If you’re just starting, a soldering iron with a stable stand and a few interchangeable tips is more than enough. It’s affordable and teaches you the basics without overwhelming you.
Soldering Stations
Think of these as “soldering irons on steroids.” Soldering stations combine the iron with a base that allows precise temperature control, sometimes even offering digital displays and safety features. Professionals and serious hobbyists love these because they provide consistent heat, which is critical for creating reliable, clean joints.
Solder Guns
Solder guns heat up faster than traditional irons and are typically used for heavier-duty tasks, like joining thick wires or working on larger electronic components. They’re less precise than irons, so they’re usually not ideal for delicate PCB work, but they shine in situations where speed and power matter.
Specialty Tools
These include things like hot-air rework stations, which are essential for soldering surface-mounted devices (SMDs), or precision micro soldering irons for tiny components. They may seem niche, but if you’re doing advanced electronics work, these tools are lifesavers.
May be you like it:
Technology for Blind People – Education to Daily Life
Tech News Top App – Stay Updated with Latest Tech Trends
Future Tech Solutions – Shaping the Digital Era
Temperature Control and Its Importance
One of the biggest mistakes beginners make with electronic soldering tools is thinking that all soldering work can be done at the same heat. Truth is, temperature control isn’t just a “nice-to-have” it can make or break your project.
Different components and solder types need different temperatures. For example, tiny surface-mounted chips are sensitive to heat. Too high, and you risk melting or damaging the component. Too low, and the solder won’t flow properly, leaving a weak, unreliable joint. On the other hand, thicker wires or larger pads need more heat to ensure the solder melts evenly.
This is why adjustable temperature irons or soldering stations are a game-changer. They let you dial in the exact heat you need for the job. You can switch between delicate electronics one moment and heavier-duty repairs the next, all without switching tools.
Here’s a practical insight from experience: I once tried soldering a small Arduino sensor with a basic iron that ran hot constantly. The solder didn’t flow smoothly, and within seconds, I noticed the board pad lifting. Switching to a temperature-controlled iron solved the issue immediately it’s like the difference between trying to paint fine details with a broom versus a fine brush.
Solder Wire Options
Choosing the right solder wire is just as important as picking the right soldering iron when working with electronic soldering tools. The solder you use directly affects the strength, reliability, and appearance of your joints. Let’s break down the main options and when to use each:
Leaded vs. Lead-Free Solder
Traditionally, solder contained lead, which made it melt easily and flow smoothly. Leaded solder is still popular among hobbyists for its ease of use, but health concerns have made lead-free solder the standard in most professional electronics today.
Lead-free solder is typically made from tin, copper, and silver. It requires slightly higher temperatures to flow, so it pairs well with temperature-controlled irons. While it can be a little trickier to work with at first, the benefits safer handling and compliance with modern electronics standards make it the preferred choice for most projects.
Rosin-Core Solder
Rosin-core solder contains flux inside the wire itself, which cleans and prepares the metal surfaces as you solder. This helps the solder flow more evenly and creates a stronger bond. Without flux, solder might bead up and refuse to stick, leaving frustrating, unreliable joints.
A little tip from experience: If you’ve ever seen a shiny, smooth joint versus a dull, blob-like one, the difference is usually flux doing its job. Rosin-core solder is especially helpful for beginners because it reduces common mistakes and improves overall results.
Wire Thickness
Solder comes in various diameters, typically ranging from 0.5mm to 1.5mm. Thin wire is ideal for small electronics or delicate PCBs it allows precise control and prevents over-soldering. Thicker wire is better for larger components or wiring projects, where more solder is needed to cover bigger surfaces.
Choosing the Right Solder for the Job
Here’s a practical rule of thumb: small boards with tiny pads? Go thin, rosin-core, lead-free. Heavy wiring or metal joins? Thicker wire, and make sure your iron can handle the higher heat needed for proper flow.
Tips, Nozzles, and Accessories
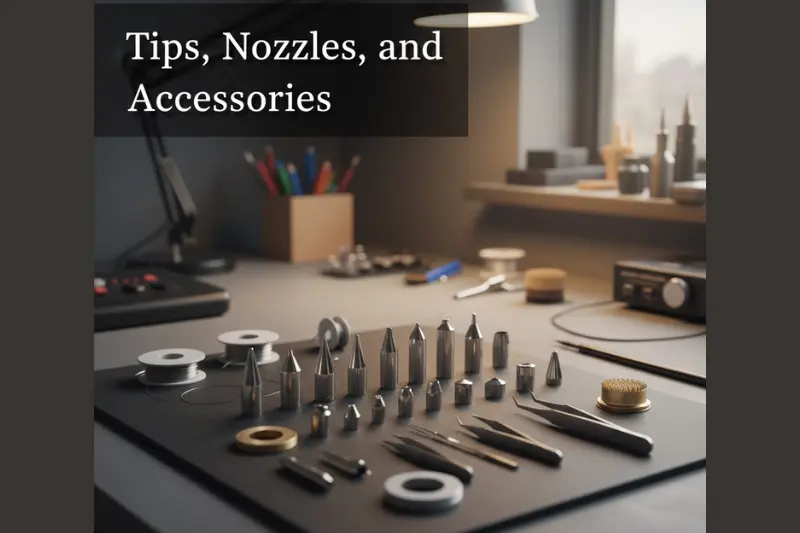
When it comes to electronic soldering tools, the tip you use can make a huge difference. Think of it like a painter choosing the right brush one tip won’t work perfectly for every joint, and using the wrong one can lead to sloppy connections or even damaged components.
Fine Tips
Fine tips are narrow and pointed, making them ideal for small pads, microchips, or densely packed PCBs. They let you work with precision without accidentally touching nearby components. For hobbyists or anyone working on tiny boards, a fine tip is almost essential.
Mini insight: I once tried soldering a delicate sensor with a blunt tip, and it was impossible to avoid bridging two pads. Switching to a fine tip fixed the problem instantly.
Chisel Tips
Chisel tips have a flat, angled surface that distributes heat more evenly over a larger area. They’re excellent for larger pads, wires, or situations where a fine tip would take too long. They can also help you get smoother, shinier joints on moderately sized components.
Bevel Tips
Bevel tips are similar to chisel tips but often have a slanted edge, which can help with dragging solder across multiple pads or working at awkward angles. They’re handy for repair work or assembly tasks that require more versatility.
May be you like it:
Which B.Tech Course is Best for Future – Career Guide
MPA Nashik e Learning – Online Police Training Platform
SBI e Learning – Online Training & Employee Courses
Safety Considerations
When working with electronic soldering tools, it’s easy to get caught up in the excitement of building or repairing circuits but safety should always come first. Soldering involves high heat, molten metal, and sometimes fumes that aren’t great for your lungs. Taking a few precautions can save you from burns, injuries, or long-term health issues.
Proper Handling
Always treat your soldering iron or station as a hot tool even if it looks small or harmless. Never leave it lying on the desk unattended, and make sure it has a stable stand when not in use. Accidentally brushing against the tip can result in painful burns, and even a momentary lapse can damage delicate components.
Fume Extraction
Solder produces smoke, especially if you’re using flux. Inhaling these fumes over time isn’t healthy. A small fume extractor or even a simple desk fan directing smoke away from your face can make a huge difference. Some hobbyists also work near open windows, but a proper extractor is ideal for frequent soldering sessions.
Protective Gear
It might feel unnecessary for small projects, but wearing basic protective gear can prevent accidents:
- Safety glasses protect your eyes from tiny solder splashes.
- Heat-resistant gloves can help when handling hot components.
- Long sleeves or apron-style clothing can keep skin safe from stray drips.
Safe Workspace Setup
Keep your workspace organized and clutter-free. Avoid flammable materials near your soldering area. Ensure cords and tools don’t create tripping hazards. Good lighting is also crucial; it’s easier to accidentally touch the tip or misplace a component in a dimly lit space.
Supporting Tools and Accessories
While the iron and solder are the stars of electronic soldering tools, supporting tools and accessories are what make your work precise, safe, and stress-free. Think of them as the sidekicks that help you look like a pro, even if you’re just starting out.
Helping Hands and PCB Holders
Trying to hold a tiny PCB, a component, and a soldering iron all at once? It’s nearly impossible. Helping hands those little adjustable clamps with magnifying lenses keep your board steady and your hands free. PCB holders serve a similar purpose, securing the board at a comfortable angle, so you can solder longer without fatigue or accidental slips.
Mini example: I once tried soldering a microcontroller without a holder. After fumbling for ten minutes, I finally grabbed a PCB clamp and suddenly, the tiny pads weren’t such a headache anymore.
Tweezers
Precision is everything when you’re dealing with microchips or small components. Tweezers let you position components exactly where they need to be, preventing bent leads or accidental bridging. Fine-point tweezers are especially useful for surface-mounted devices.
Wire Strippers and Cutters
Good electronics work requires clean wires. Wire strippers remove insulation without damaging the conductor, and small cutters trim excess leads neatly. Using these tools saves time and keeps your solder joints tidy.
Desoldering Tools
Mistakes happen, even to seasoned technicians. Desoldering pumps (solder suckers) and desoldering braid allow you to remove excess solder or fix errors without damaging your board. They’re essential for rework, repairs, or learning from your mistakes without frustration.
Techniques for Clean Solder Joints
Even with the best electronic soldering tools, clean joints don’t happen by accident they come from the right technique. Here’s a practical, step-by-step approach to help you solder like a pro:
Prep Your Workspace and Components
Before touching the iron, make sure your board and components are clean and positioned correctly. Oxidized pads or dirty leads can prevent proper solder flow. Use tweezers, PCB holders, or helping hands to stabilize components.
Heat the Joint, Not the Solder
Place the iron tip on both the pad and the lead, letting the metal heat evenly. Only then feed solder into the joint. This ensures the solder flows smoothly and creates a strong bond.
Use the Right Amount of Solder
Too much solder creates blobs, while too little leaves weak connections. A good joint is shiny, slightly concave, and fully covers the pad. Remember, it’s better to add more if needed than to start with a huge blob.
Avoid Common Mistakes
- Cold joints: caused by insufficient heat. They look dull and may fail over time.
- Solder bridges: when solder unintentionally connects two pads. Often happens on densely packed boards.
- Overheating: can damage components or lift pads from the PCB.
Mini insight: I once spent an hour troubleshooting a broken sensor, only to find one cold joint was the culprit. A small change in technique would have saved me that headache.
Let it Cool Naturally
Don’t blow on the joint. Letting solder cool on its own prevents cracks and ensures a solid, reliable connection.
Choosing the Right Soldering Kit
Selecting the right kit is about more than price it’s about matching your electronic soldering tools to your needs, skill level, and project type.
Frequency of Use
Occasional hobbyist: A basic soldering iron with a few tips is enough.
Regular DIYer or student: A temperature-controlled iron or small station provides better control and consistency.
Professional or technician: A full soldering station with adjustable heat, tip variety, and safety features is worth the investment.
Project Type
Simple kit assembly or wire repairs? A basic setup will do. Working with microchips, surface-mounted components, or advanced electronics? You’ll need precise temperature control and specialized tips.
Skill Level
Beginners benefit from kits that include:
- Interchangeable tips
- Stand/holder
- Helping hands
- Clear instructions or tutorials
Experienced users might prioritize:
- Faster heating stations
- Hot-air rework tools
- Fine-point tips for SMDs
Budget Considerations
You don’t need the most expensive setup to get professional results, but skimping too much can be frustrating. Mid-range kits often strike the perfect balance between quality and affordability, offering durability, safety, and versatility without breaking the bank.
Maintenance and Longevity of Soldering Tools
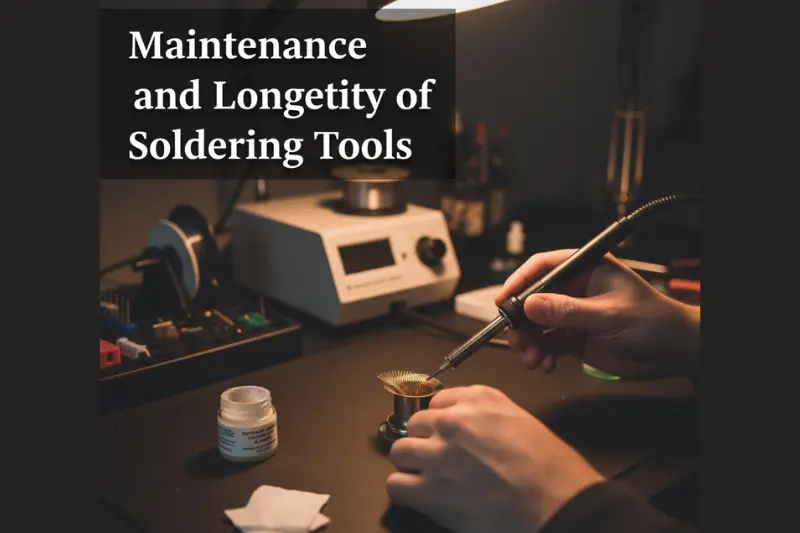
Even the best electronic soldering tools won’t last forever if you don’t take care of them. Proper maintenance not only extends the life of your equipment but also ensures consistently clean, reliable solder joints. Here’s how to keep your tools in top shape:
Cleaning Tips
After each use, wipe the soldering tip on a damp sponge or brass wool to remove oxidized solder and residue. This simple habit keeps heat transfer efficient and prevents dull, uneven joints. A dirty tip can make even the best soldering station feel frustrating to work with.
Replacing Tips
Over time, tips wear out, get pitted, or coated in stubborn oxidation. Replacing worn tips keeps your iron working efficiently and prevents damage to delicate components. Always use manufacturer-recommended tips for your soldering station to ensure proper fit and performance.
Proper Storage
Store soldering irons and stations in a stable stand when not in use. Keep cords untangled, avoid damp environments, and protect tips with caps or covers if available. A tidy storage routine prevents accidents and prolongs tool life.
FAQs About Electronic Soldering Tools
What are the essential electronic soldering tools for beginners?
A basic soldering iron with adjustable temperature, rosin-core solder, a few interchangeable tips, and a PCB holder are enough to get started safely and effectively.
Should I use leaded or lead-free solder?
Lead-free solder is the modern standard and safer for frequent use. Leaded solder flows more easily and can be fine for hobbyists, but always handle with care.
How do I choose the right tip for my soldering work?
Use fine tips for small pads or microchips, chisel tips for larger components, and bevel tips for tricky angles. Keep the tip clean for smoother joints.
Why is temperature control important in soldering?
Adjustable heat prevents damage to delicate components, ensures proper solder flow, and helps create reliable, shiny joints.
How can I maintain my soldering tools for longevity?
Clean tips regularly, store irons in a safe stand, avoid overheating, and replace worn tips to keep your tools performing like new.
Conclusion
Mastering soldering isn’t just about buying the most expensive electronic soldering tools it’s about understanding your equipment, choosing the right tips and solder, practicing proper techniques, and caring for your tools. Each step, from selecting the right kit to maintaining your iron, builds the foundation for clean, reliable, and professional-quality solder joints.
Remember, even small habits like cleaning your tip, using a stable PCB holder, or adjusting the temperature for delicate components make a huge difference. Soldering is part skill, part patience, and part knowing your tools inside out.
May be you like it:
Digital Marketing Internship – Kickstart Your Career
Best Digital Marketing Agency – Grow Your Business Fast
